
As a developer we sometimes face a situation where we have to run multiple java versions, due to applications requirement. Of course configuring it and switching between them is always a pain for developer.
In this post we we see how we can seamlessly switch between Java Versions using Jenv.
1.0 Setup – Install 3 different versions of JDK
For the demonstration purpose we will install three different versions of Oracle JDK in our local environment
- Oracle JDK 16 (16.0.1)
- Oracle JDK 11 (11.0.11)
- Oracle JDK 8 (1.8.0.291)
Although we installed all three versions – only one of them can be used at a time
You can check the same by running the command – java -version
For us, the default version is 16.0.1

2.0 Crude way to switch Java Versions
One crude way to switch Java versions is to keep updating JAVA_HOME environment variable, and add JAVA_HOME/bin to the PATH environment variable.
Lets see how we can do it
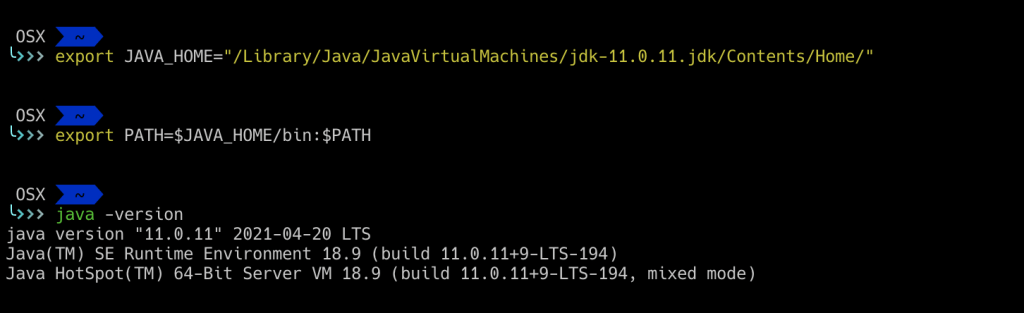
As you can see in the above example, we were able to access Java 11, even though our default Java version was Java 16. We did this by three commands
- Setting
JAVA_HOMEenvironment variable to Java 11 (JDK which we wanted to use) - Adding
JAVA_HOME/bintoPATHenvironment variable
And that’s it we are able to use Java 11 now.
Now lets do similar changes and use Java 8 instead
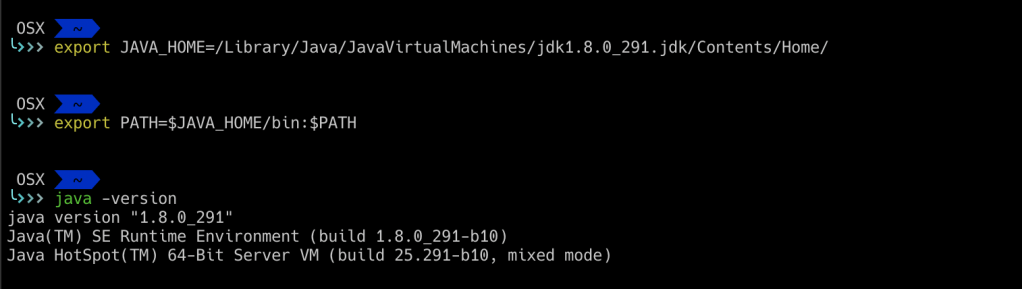
This a crude way of doing it, and the major disadvantage is that we always have to set/reset
JAVA_HOMEandPATHenvironment variables to use different versions of Java.
3.0 Using JENV to switch Java Versions effectively
Now we will see a very cool way to swith Java versions effectively using JENV
JENV can be used on both Linux and Mac.
In our examples however we will see how to do it on Mac.
3.1 Installation
You can either install it via git command or using brew on a Mac
Option 1
git clone https://github.com/jenv/jenv.git ~/.jenv
Option 2
brew install jenv
3.2 Configuration
Once installed, we need to do some more configuration.
These configurations can be added to either your Bash Profile (~/.bash_profile) OR ZSH Profile (~/.zshrc)
Since I am using ZSH so i will show the commands for it.
echo 'export PATH="$HOME/.jenv/bin:$PATH"' >> ~/.zshrc

echo 'eval "$(jenv init -)"' >> ~/.zshrc
3.3 Adding Java Versions to JENV
By default JENV does not knows where you have installed Java and how to run different versions to it.
You can check by running command – jenv versions
We have already installed 3 versions of JDK. We will just add their installation paths to the JENV.
We can do so, by running jenv add <jdk-path> command.

As you can see, we first added JDK 8, then JDK 11, and then JDK 16.
Now if we run jenv versions, we can now see all available versions of Java.
3.4 Adding Java Versions to JENV
Now suppose that we have following requirements
- We want our default JDK to be Java 16
- However for two directories we want to override the JDK
- Directory
~/dirOne– We want to useJava 11 - Directory
~/dirTwo– We want to useJava 8
- Directory
We can use JENV command to set two types of JDK
- Global JDK
- JDK that is used by default in the system.
- Can be configured by running command –
jenv global <java-version> - e.g.
jenv global 11.0.11
- Local JDK
- JDK that is local to any particular folder or directory.
- Can be configured by running command –
jenv local <java-version> - e.g.
jenv local 1.8 - This command creates a file –
.java-versionin the given directory. So even if we come back to this directory later, it will use the same JDK version that we had set earlier.
Let’s see some example
First we will set JDK 11 for directory ~/dirOne

Now let’s set another local JDK for directory ~/dirTwo

Now let’s see how we can set th Default or Global JDK.
Once we do this, we will use this JDK everywhere (except where we have local JDK configured)

So we have seen how we can easily configure different JDKs using JENV and effortlessly switch between them.
