

In this blog we will see how to create a local Kubernetes cluser – using Minikube or Kind. We will start with installing all the pre-requisites, and then create the cluster (with one or more nodes). At the end will see different ways to connect to the cluster and view cluster information. In our next blog, we will see how to create a Kubernetes cluster on Google Cloud and access it from local machine.
Table of Contents
1.0 Install Pre-requisites
Lets start with installing a few softwares.
1.1 Install Docker, Kubernetes and Kubectl
For Windows and Mac – Just install Docker Desktop. It includes Docker App, developer tools, Kubernetes and version synchronization to production Docker Engines.
For Linux, install following separately
1.2 Install minikube
Minikube requires container or virtual machine manager, such as: Docker, Hyperkit, Hyper-V, KVM, Parallels, Podman, VirtualBox, or VMWare. Since we have already installed Docker, we will use it along with minikube.
On Mac, you can simply install using brew
brew install minikubeOn Linux, you can download the binary and install
curl -LO https://storage.googleapis.com/minikube/releases/latest/minikube-linux-amd64

sudo install minikube-linux-amd64 /usr/local/bin/minikube
On Windows, you can download the installer and run it.
1.3 Install Kind
On Mac, run
brew install kindFor Linux and Windows, you can download the required version of Kind from the Release page (download from Assets section)
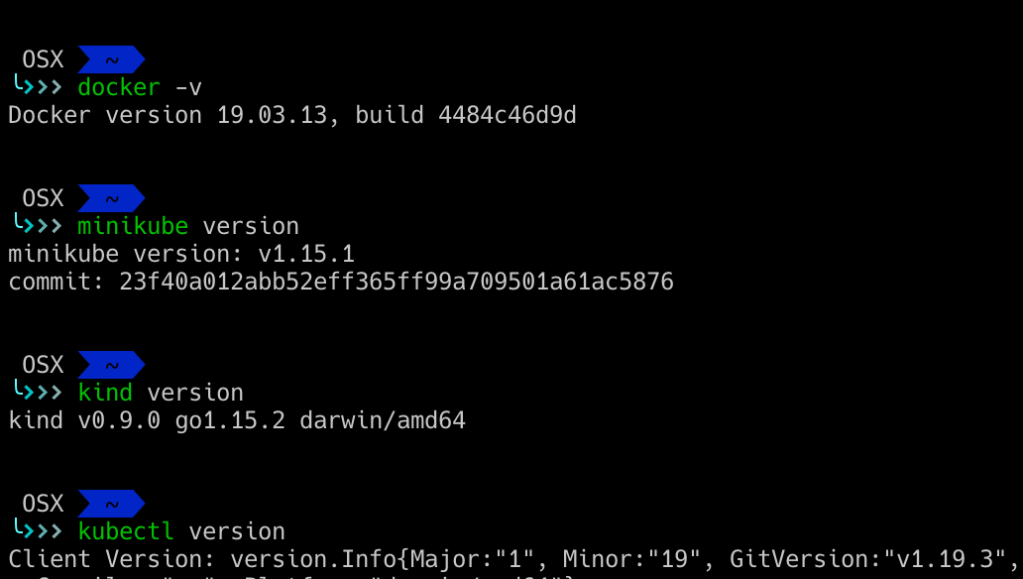
1.4 Verify the installation
Verify if all the installations done correctly by running below commands
docker -v

minikube version

kubectl version

kind version
You will see output something like this.
2.0 Kubernetes Cluster using Minikube
2.1 Creating the cluster
minikube is local Kubernetes, that makes it easy to learn and develop for Kubernetes.
So you don’t have to create a costly cluster on any Cloud provider in order to learn Kubernetes and play with it. You can install minikube on your local machine, and get a 1 Node cluster to play around with.
And its pretty simple to start this cluster
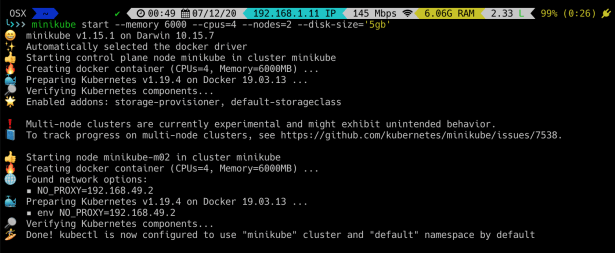
e.g. to start a minikube cluster with 6GB memory / 4CPU / 5GB disk and 2 nodes, just run below command
minikube start --memory 6000 --cpus=4 --nodes=2 --disk-size='5gb'You will see an output like this.
By default it has used the docker driver. But if you want to use some other driver (e.g HyperKit), then you need to install that driver and pass an additional argument to specify the driver. e.g.
minikube start --memory 6000 --cpus=4 --nodes=2 --disk-size='5gb' --driver=hyperkit2.2 Connecting to the cluster
Lets first run few commands to verify if cluster is up and running.
Run docker ps command to verify that two minikube containers are running (1 per node).

2.2.1 Getting cluster information using kubectl command
Run kubectl command to get cluster information
kubectl cluster-info

kubectl get nodes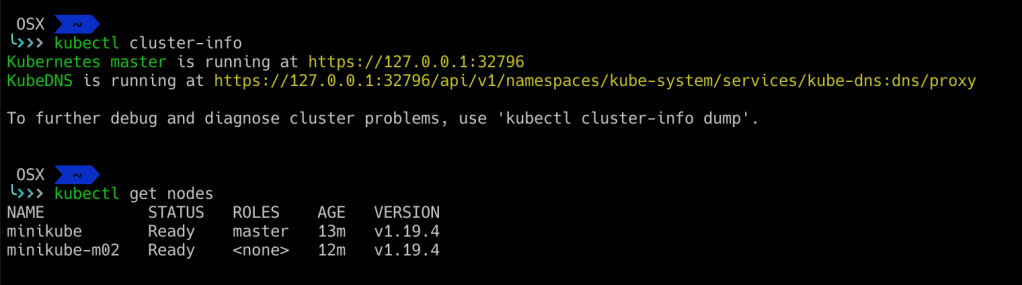
In case you have multiple cluster contexts set up on your local machine, then you need to first switch the context using command –
kubectl config use-context minikube
2.2.2 Connecting to the cluster nodes
Run command minikube ssh to get access to the minikube nodes. By default it will SSH to first node. In case there are other nodes and you want to SSH into them, then provide --node argument. e.g.
minikube ssh

minikube ssh --node=m02
2.2.3 View cluster logs
You can view minikube cluster logs using below command.
minikube logs -fAdd -f argument only if you want to tail the logs.
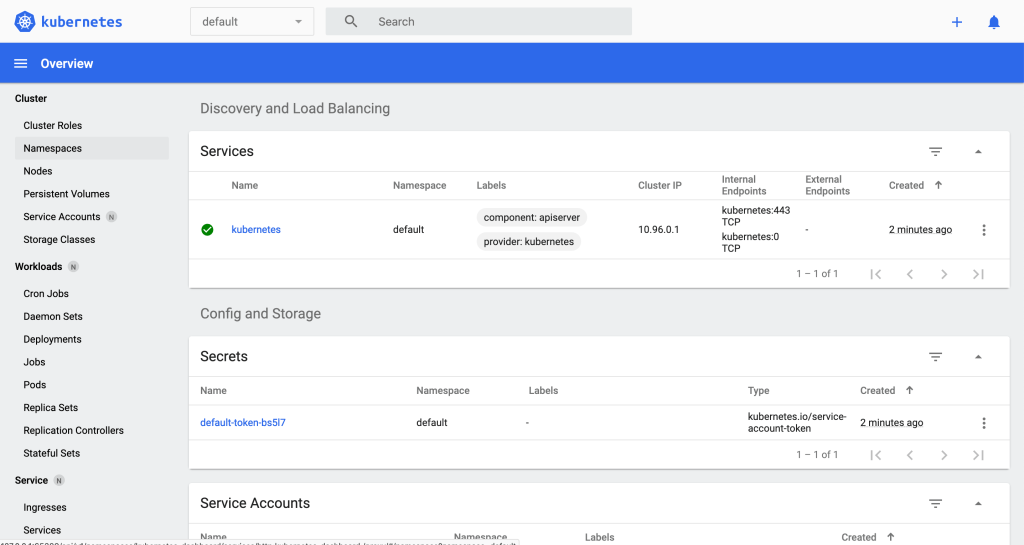
2.3 Accessing Kubernetes Dashboard
Last but not the least, run Kubernetes Dashboard to get full access to your cluster. Run command below
minikube dashboardThis did not work on minikube v1.15.1, if number of nodes is more than 1.
However when i re-tested it again on v 1.22.0, it is now working even with multi nodes
You can view the dashboard the dynamic URL generated. It will will give you full dashboard view of your local cluster
2.4 Stopping or Removing the cluster
You can stop the minikube cluster using command
minikube stopAfter it stops, you can restart it back using command minikube start
However for some reason if you want to delete the entire cluster, then run command
minikube delete
3.0 Kubernetes Cluster using Kind
3.1 Creating the cluster
3.1.1 Creating a simple 1 node cluster
To create a simple cluster you can just run the command
kind create cluster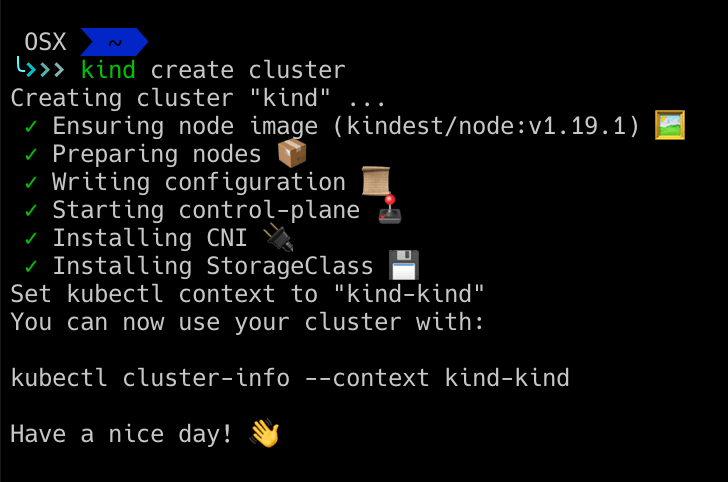
3.1.2 Creating a cluster with more configuration options
There are times where you may not be satisfied with the default 1 node cluster and may want to configure how to create the cluster.
Kind provides this option via a YAML configuration file.
kind create cluster --config=<config-file-location>for e.g. in order to create a cluster with 2 master plane nodes, and 3 worker nodes – we will create the following YAML file – kind-cluster-config.yaml
kind: Cluster
apiVersion: kind.x-k8s.io/v1alpha4
nodes:
- role: control-plane
- role: control-plane
- role: worker
- role: worker
- role: worker
And then create the cluster using this configuration file
kind create cluster --config=./kind-cluster-config.yaml
3.2 Connecting to the cluster
Lets first run few commands to verify if cluster is up and running.
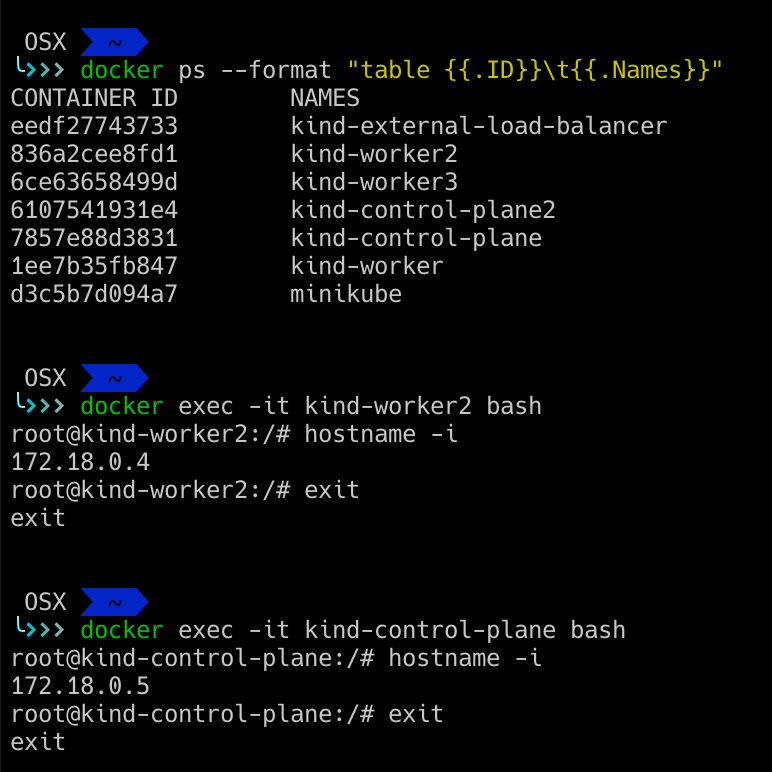
Run docker ps command to verify that Docker containers are created for the Kind cluster
(we had created a multi node cluster with 2 control and 3 worker nodes)

3.2.1 Getting cluster information using kubectl command
First of all verify if your kubectl is using the right context for connecting to the cluster.
This is very important step.
You may have multiple local clusters OR you might have configured your kubectl to connect to your clusters on cloud. So it is always good to verify which context are you using to connect to the cluster
Run command
kubectl config get-contextsSince I had two local clusters created – minikube and kind, I have two contexts right now
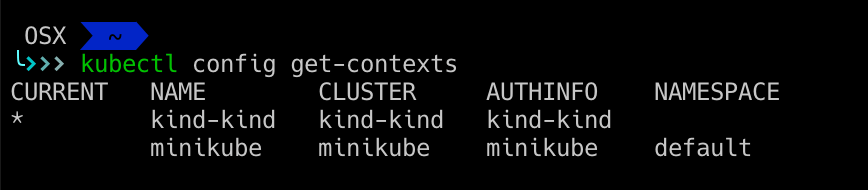
Use command kubectl config use-context, to switch contexts, and kubectl config current-context to find which one is the current context in use.
See below to understand how we can switch contexts easily
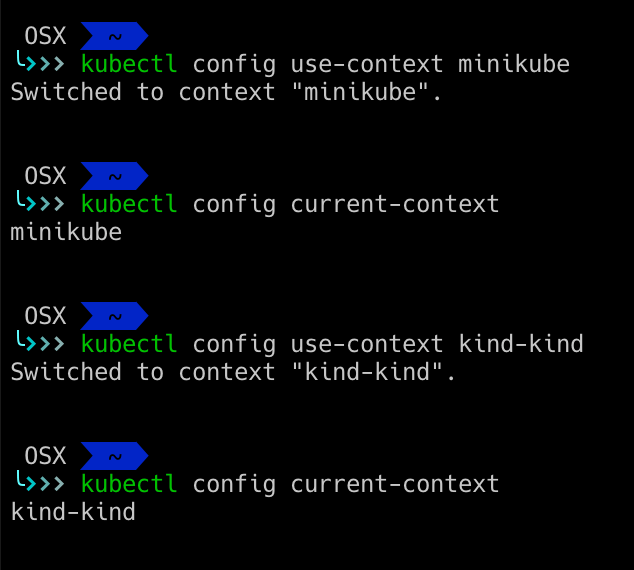
Use context
kind-kindto connect toKindcluster
As we had seen before, run below kubectl command to get cluster information
kubectl cluster-info

kubectl get nodes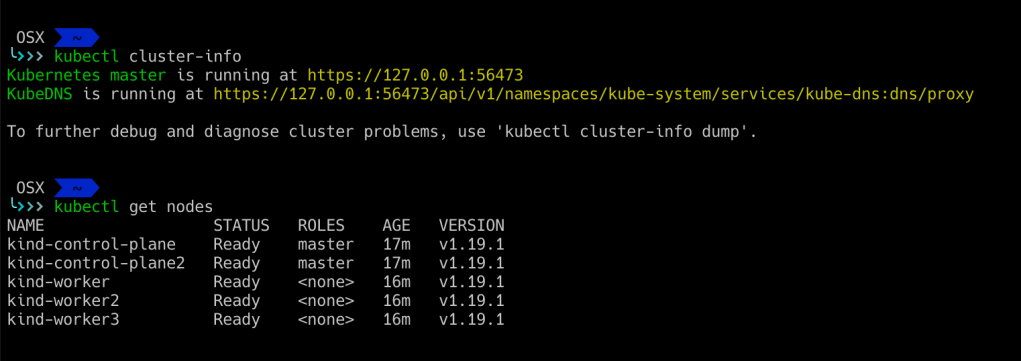
3.2.2 Viewing cluster logs
Kind lets you export all the cluster logs to a folder, from where you can view logs for each node.
Run the command
kind export logs
3.2.3 Connecting to cluster nodes
Since the nodes started by Kind are just docker containers, you can access the cluster nodes using regular docker commands.
3.3 Deleting the cluster
You can simply delete the cluster using command
kind delete clusterWith this we come to end of our current blog.
In next blog of this series, we will see how to create a Kubernetes cluster on Google Cloud and connect to it from local machine.
