
In this blog we will look at deployment and auto-scaling of a spring boot application using AWSElastic Beanstalk. We will also demonstrate how AWS will automatically provision new EC2 instances when the application load increases, and removes them when application load decreases.
Table of Contents
1.0 Introduction
1.1 Pre-requisites
This AWS tutorial blog is not for newbies, and following are the pre-requisites that you will need to fulfill if you need to follow and try out the steps given in this tutorial blog.
1.1.1 AWS Account
We assume you already have an AWS account that you can use.
Since this is only a demonstration blog, we will not use high performance servers and try to make maximum use of AWS Free Tier
1.1.2 Basic understanding of AWS
This blog assumes that you are familiar with basic AWS concepts like EC2, RDS, VPC, Subnet, Load Balancer, etc.
If you are a complete newbie to AWS, then please go through my previous AWS blogs first to understand the basic components of AWS.
1.1.3 Sample Web Application
- You should be aware of what a web-application is (even if you cannot built one right now).
- Since this is not a blog on how to create a sample web application, we will not focus on that aspect, and instead use an existing pre-built application.
- For our blog we are using a sample application created using Jhipster. You can directly download the application war file – demo-0.0.1-SNAPSHOT.war, and use it. (Recommended option)
1.2 Why Elastic Beanstalk
In our last blog, we looked at how to deploy a Spring Boot application on AWS using EC2/RDS and Elastic Load Balancer.
There were few pain points in the earlier deployment that we did
- We have to manually configure our EC2 instances. e.g. Install Java, Install and configure tomcat, etc.
- We have to manually create image of our EC2 instance, and use that instance to provision additional EC2 instances.
- We created a fixed no. of EC2 instances and there was no auto-scaling
- This meant we paid more cost to keep all the instances up and running even though we did not need them
- When the load increased, we had to manually create and deploy new EC2 instances.
- Configuration of Load Balancer, etc. had to be done manually.
This is too much work and is not ideal for a cloud deployment. Woudn’t it be better if AWS can manage and provision the EC2 instances for us based on the load?
That’s the prime motivation behind deploying our application using Elastic Bean Stalk.
1.3 What is Elastic Beanstalk
- With Elastic Beanstalk, we can deploy, monitor, and scale an application quickly and easily. AWS does the heavy lifting so we can focus on our business.
- Elastic Beanstalk handles following details of our hosting environment – capacity provisioning, load balancing, scaling, and application health monitoring.
- When we deploy our app on Elastic Beanstalk, we can choose a platform configuration like Tomcat, Java, Go, Docker, Python, PHP, etc. A platform configuration defines the infrastructure and software stack to be used for a given environment.
- Based on the platform configuration of our choice, Elastic Beanstalk provisions a set of AWS resources that can include Amazon EC2 instances, alarms, a load balancer, security groups, and more.
2.0 Deployment Architecture
Before we deep dive into how to setup an Elastic Beanstalk and run our application, lets look at what we are trying to build on a very high level.
The deployment architechture is almost the same as the one we built in our last deployment demo (as shown below)

The current Elastic Beanstalk deployment will however have minor differences from the one shown above.
- Number of EC2 instances will not be fixed to 4, but they will auto-scale from 1- 4 depending on the load.
- We will use an
Application Load Balancer, instead of aClassic Load Balancer.
3.0 Configuring Elastic Beanstalk
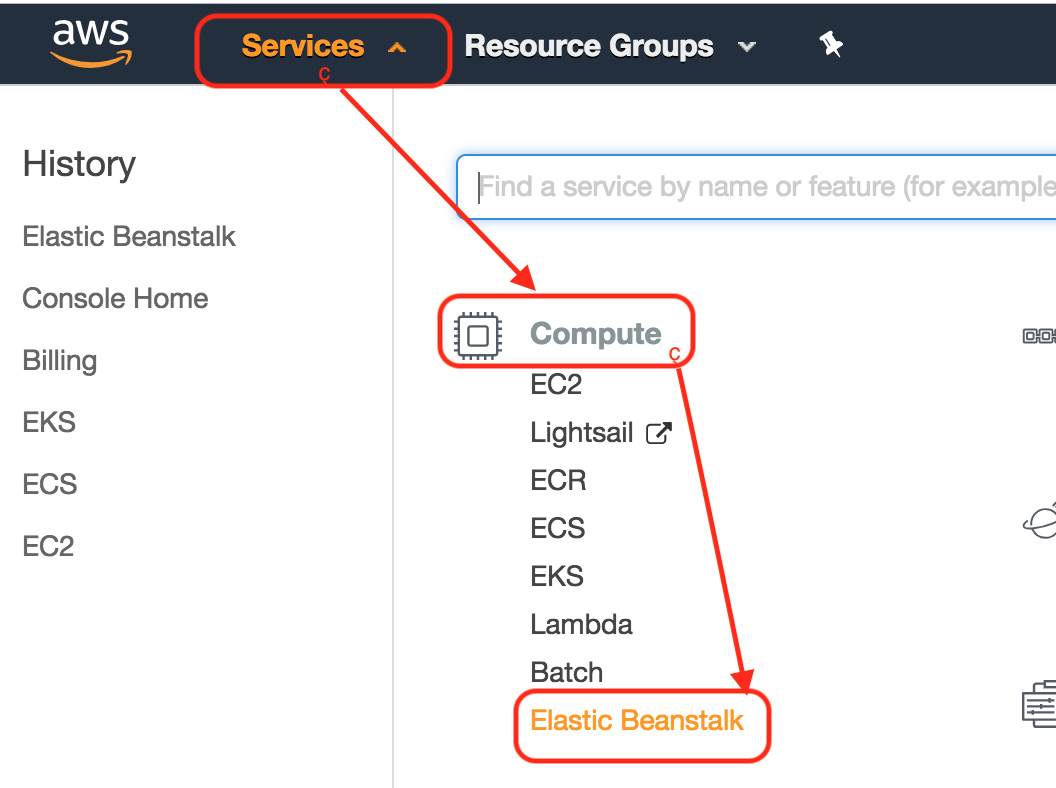
Login to your AWS Management Console, and go to Services >> Compute >> Elastic Beanstalk.
3.1 Create a new application
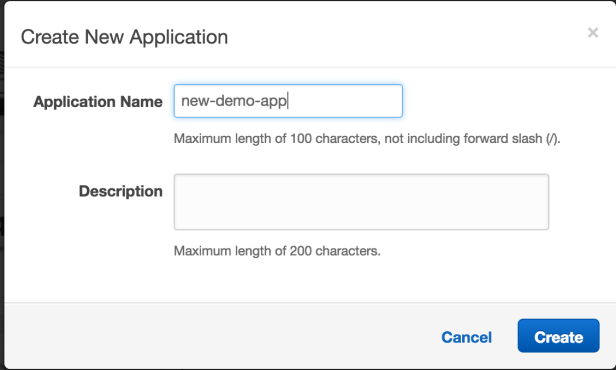
We start with creating a new Elastic Beanstalk application.
- Click on ‘Create New Application‘ link as shown below

- Provide a name for your application
3.2 Create a new environment for your application
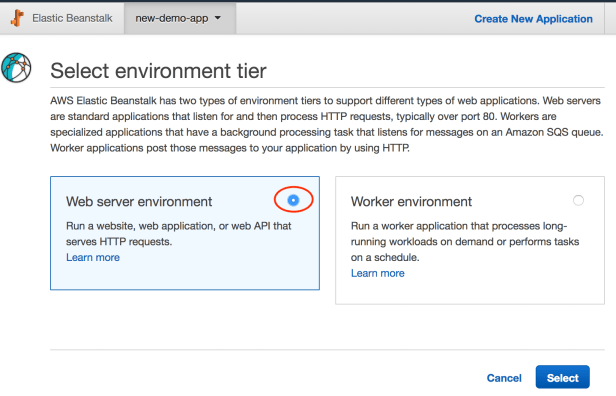
Once you create your application, you need to create and configure an environment for your application.
- Click on ‘Create environment‘ link

- Select ‘Web server environment‘, as we will be deploying a web application
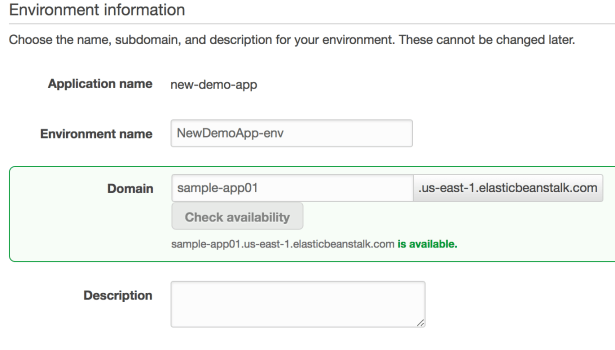
- Provide a name for the environment, and choose a domain.
- You can optionally choose to leave the domain empty also, to get an auto-generated domain.
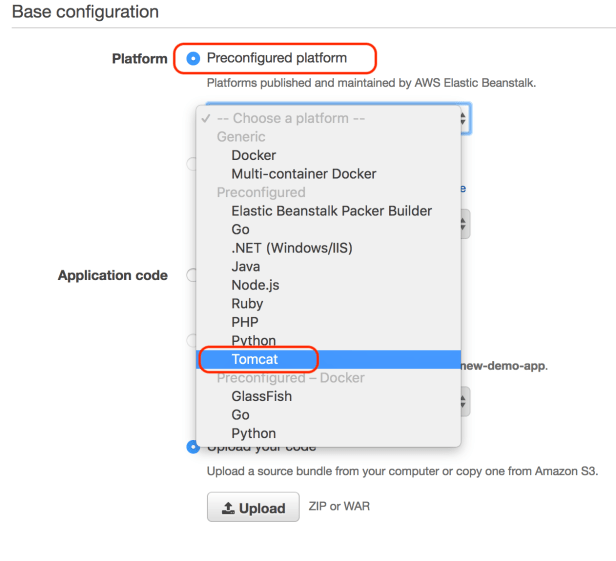
- Choose a ‘Pre-configured platform‘ for your environment.
- AWS
Elastic Beanstalkprovides many out of the box pre-configured platforms, that prevents us the hassle of configuring everything. - For our example we choose the Tomcat platform, which will have
Apache Tomcat 8.5andJava 8pre-installed and configured for us.
- Next, upload your application code.
- You an upload any application war file.
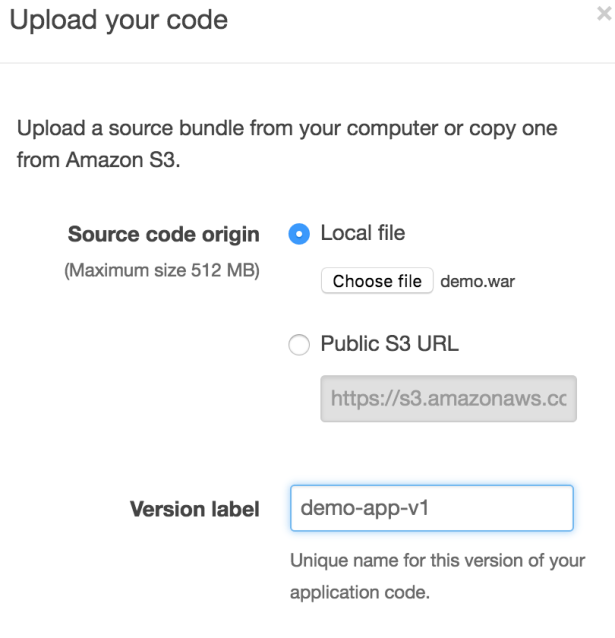
- In our demo, we have uploaded following sample Jhipster application – demo-0.0.1-SNAPSHOT.war
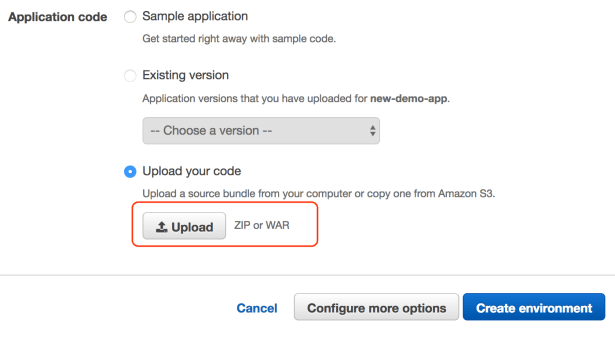
- Upload your local war file.
- This will internally copy the war file to AWS S3
- Once all above is done, DO NOT select ‘Create environment‘, but choose to configure more options.
We have chosen a
Tomcatenvironment, because we wanted to demo how to deploy our application on aTomcatServer.However since this is a
Spring Bootapplication, you do not need aTomcatapplication server to run it. You can also choose a simpleJavaplatform and deploy your Spring BootJarfile.
3.3 Configure additional options for the environment
- Select ‘Custom configuration‘ for the environment
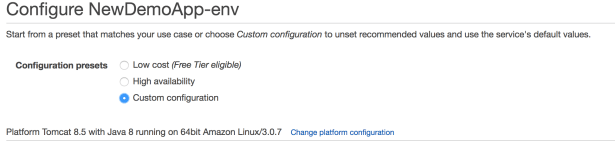
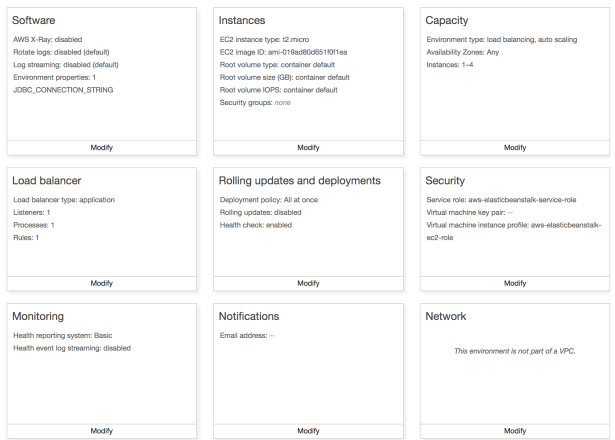
- You will see following options for configuration
- We will configure them one by one.
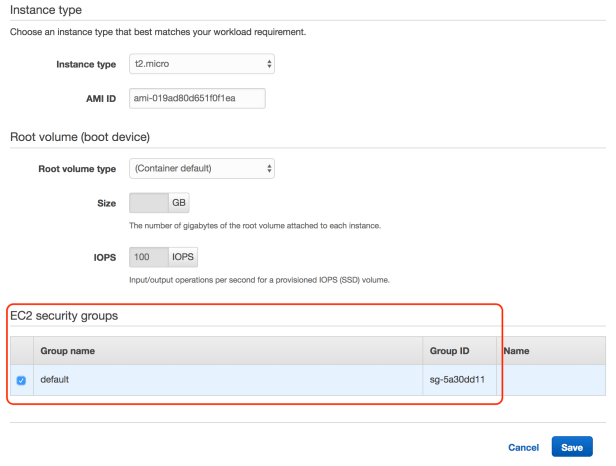
3.3.1 Configure Instances
- Configure EC2 Instances.
- Go to Instances >> Modify

- Leave all options as default (for our demo purpose)
- Select the default security group checkbox
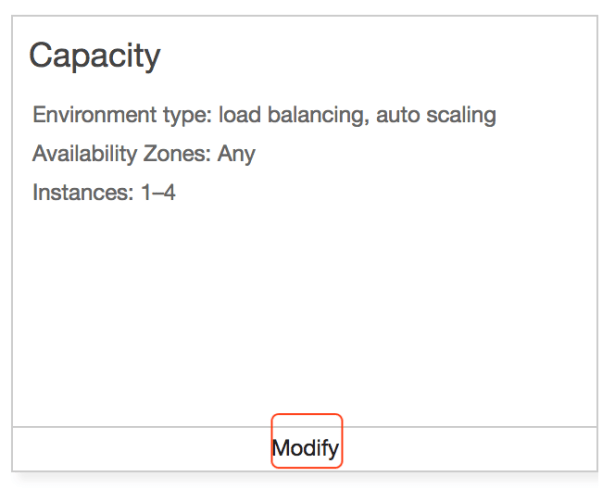
3.3.2 Configure scalability
- Go to Capacity >> Modify
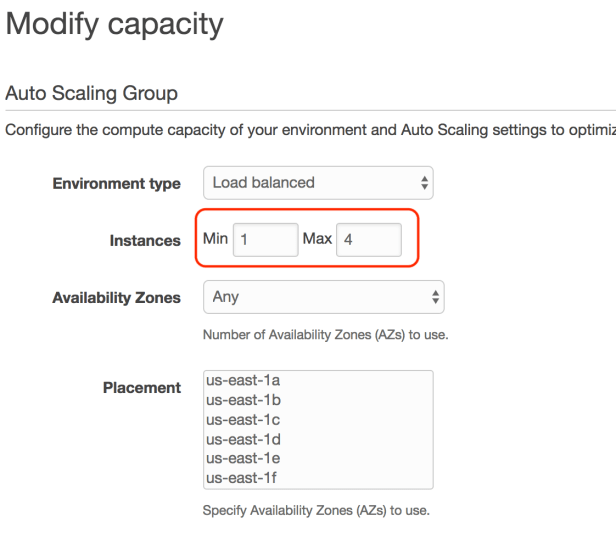
- Select following options for Auto Scaling Group
- Environment type: Load Balanced
- Instances: 1 – 4 (min = 1, max = 4)
- Availability Zones: Any
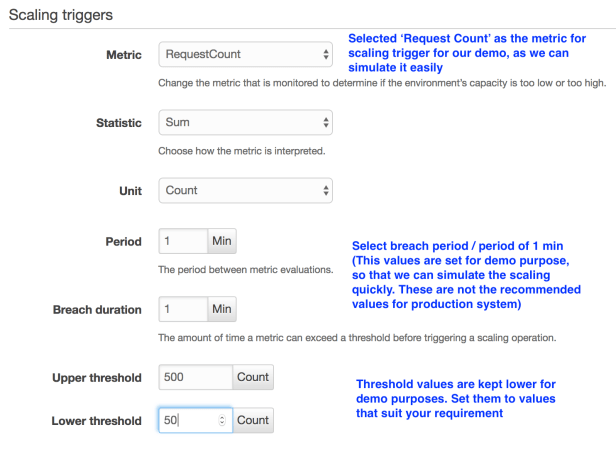
- Select scaling triggers – based on which AWS will auto-provision new EC2 instances or remove existing EC2 instances.
- Select following options for demo
- Metric: Request Count
- Statistic: Sum
- Unit: Count
- Period: 1 min
- Breach duration: 1 min
- Upper threshold: 500
- Lower threshhold: 50
- Note that these configurations are only for our demo purpose, so that we can simulate the auto scaling of the environment.
- With this configuration, AWS will auto-scale the environment depending upon the total number of HTTP Requests received by the environment.
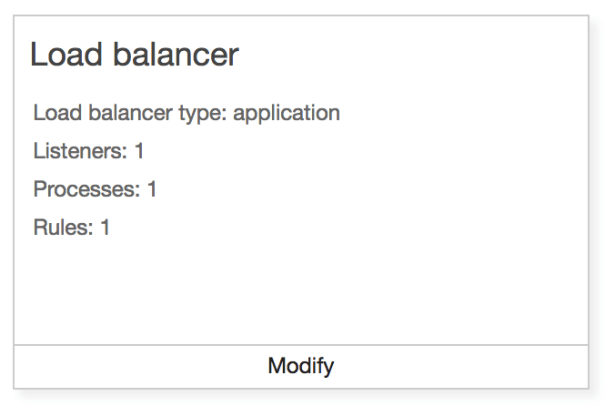
3.3.3 Configure Load Balancer
- Now we will configure the load balancer.
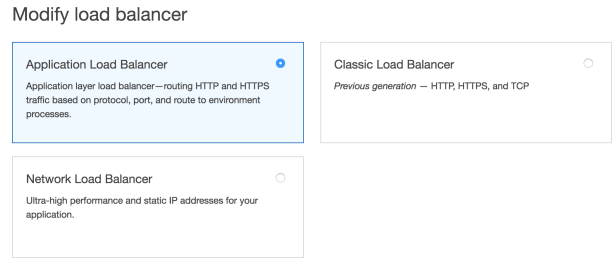
- Go to Load Balancer >> Modify
- Select ‘Application load balancer‘
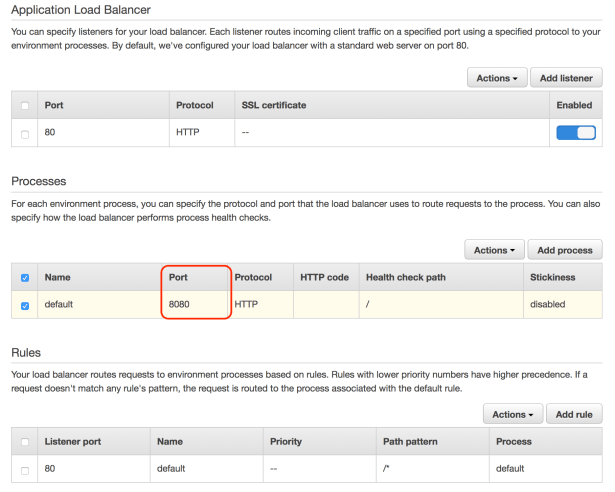
- Leave all the settings to their default value, which will ensure that the load balancer will listen to HTTP Requests at Port 80.
- Just modify the Port number of Processes, to 8080. This will ensure that the load balancer will forward all HTTP Requests it received to the port 8080 of the Tomcat process on the EC2 instances.
3.3.4 Configuring Network and VPC
- Go to Network >> Modify
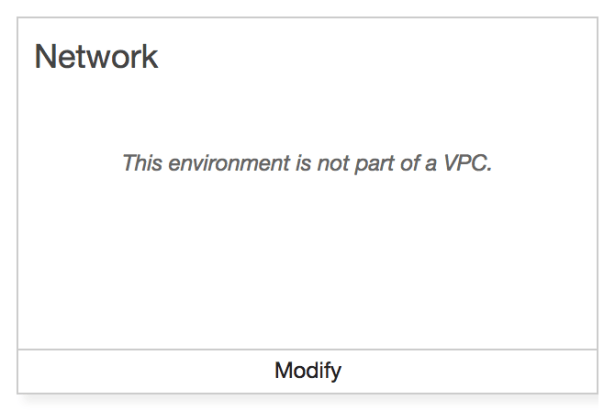
- Don’t modify any of the default settings.
- Just select two of the existing
subnets, for the load balancer.
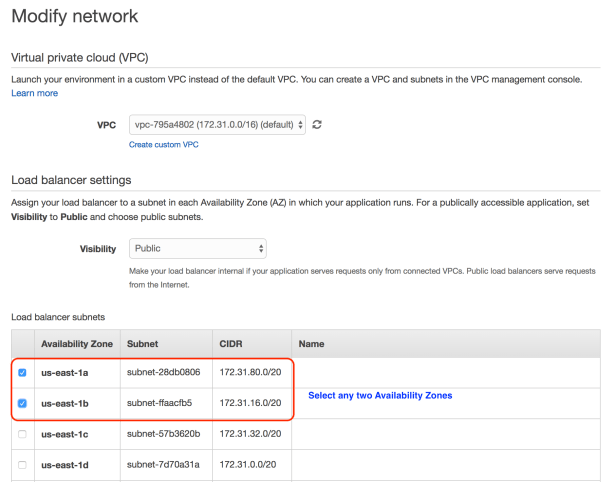
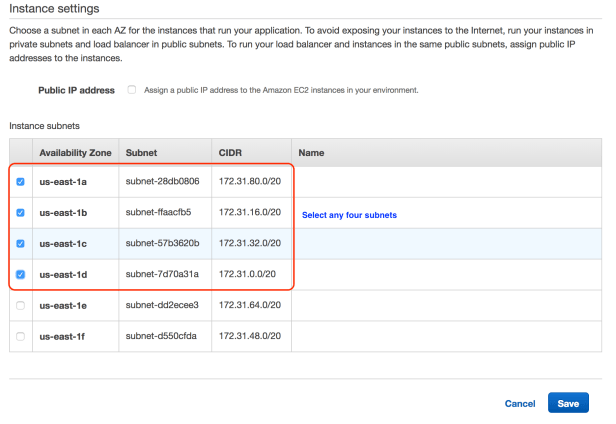
- Go to Instance settings, and select any 4 out the 6 available subnets for each AZ.
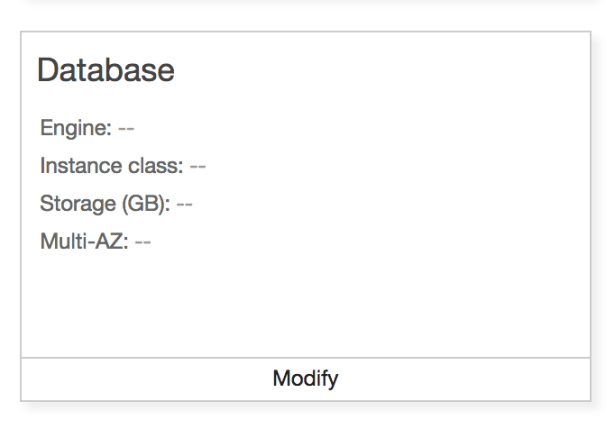
3.3.5 Configure RDS
- For our application, we need a Mysql database.
- Go to Database >> Modify, to configure the RDS.
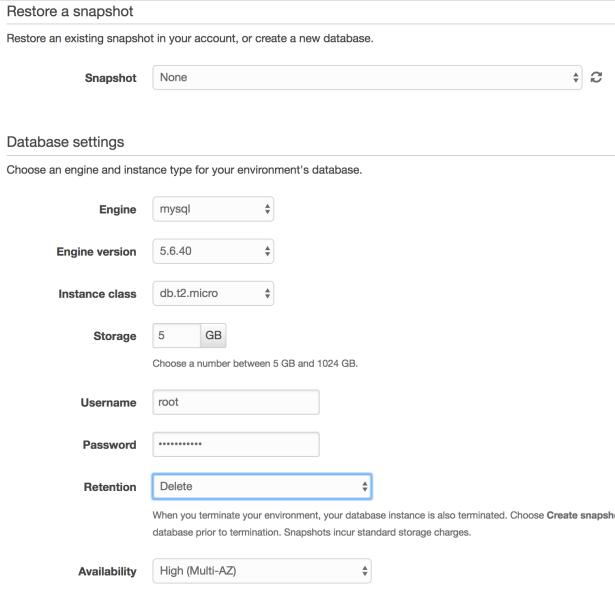
- Configure the database settings
- Engine: Mysql
- Engine version: 5.6.40 (or any latest one)
- Instance class: db.t2.micro (a very small configuration, suitable for our demo)
- Storage: 5GB (we need very low database size for our demo)
- Username/Password: Provide anything, but remember the values
- Retention: Delete (as we do not want to retain anything for our demo. For actual production deployment, don’t select this value)
- Availability: High (Multi-AZ). This will deploy database in two AZ. If the database in main AZ is unavailable due to any reason, the replica in second AZ will become the primary database.
3.3.6 Finish configuration
- Now we have finished most of our initial configuration.
- Click on ‘Create Environment‘, to start the deployment
- This will take some time to finish.
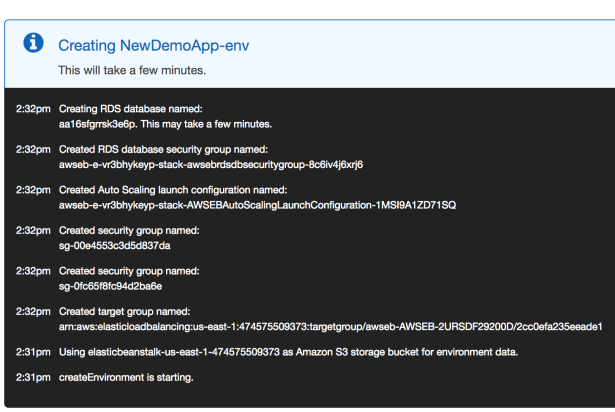
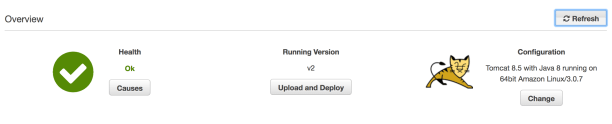
- Once it completes, you can see following in the Environment “Dashboard“
4.0 Testing the deployment
4.1 Access the application
- Once the deployment completes, you can Go to the environment “Dashboard“
- You can see that Health of application is “OK“.
- URL of the application is also shown on top of the dashboard.
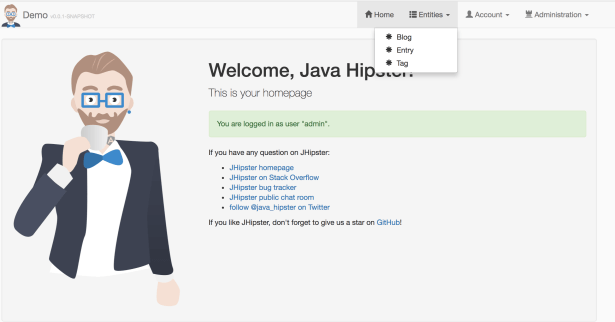
- On clicking the URL, you can access the deployed application
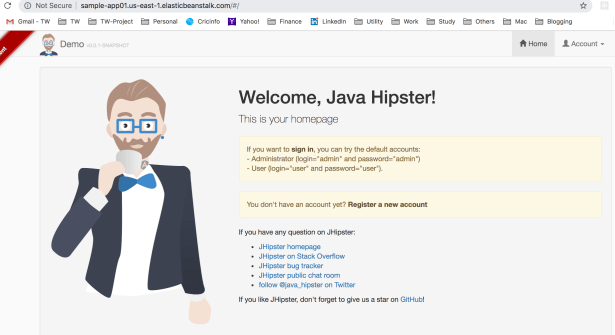
- Go to Account >> and Sign In to the application
- Username: admin
- Password: admin
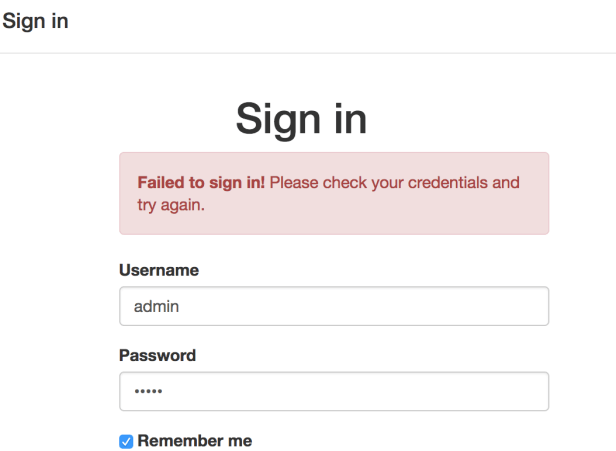
- As you can see, the login failed.
- This means something is still not right in our application deployment
4.2 Viewing application logs
- We will view the application logs, to understand what is wrong with our application
- Go to Logs >> Request Logs >> Full Logs, to request application logs
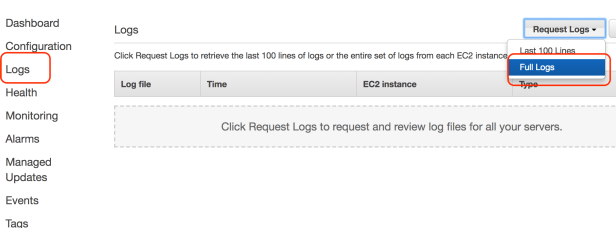
- Download the logs, once it is available.
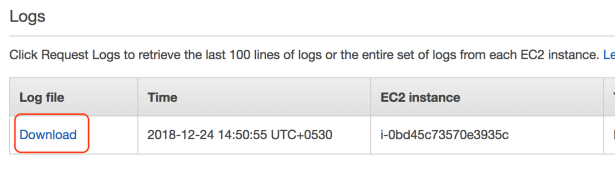
- Download the log zip file, and you can see following log files in the zip file
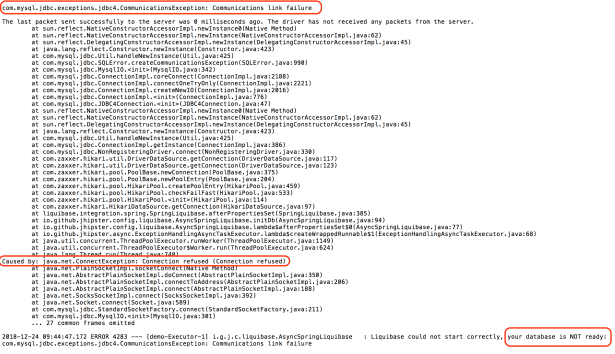
- Open the log file – catalina.out

- Once you open the log file ‘catalina.out‘ and scroll down, you can view the root cause of failure – The application is not able to connect to the database.
5.0 Configuring database connection for our application
- Go to your environment >> Configuration >> Database
- Copy the database endpoint URL. e.g.
aa16sfgrrsk3e6p.c4cjbtlqf6yt.us-east-1.rds.amazonaws.com:3306
- Now go to your environment >> Configuration >> Software >> Modify
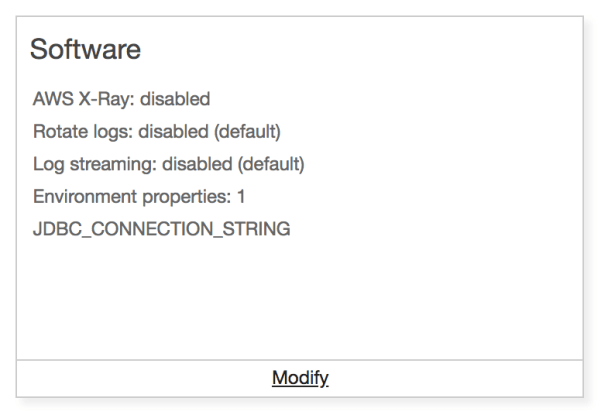
- We have already got the URL of the database endpoint from above.
- Default database instance name for Elastic Beanstalk is
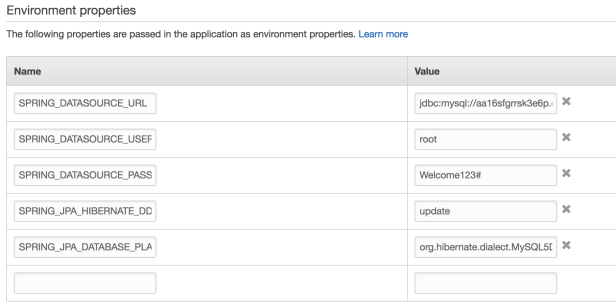
ebdb - Add the following environment properties, to configure the database connection properties for your database.
org.hibernate.dialect.MySQL5Dialect
| Property | Value |
| SPRING_DATASOURCE_URL | Database JDBC URL
jdbc:mysql://[database-url]/[database-name] jdbc:mysql://aa9djrx1dq7fzs.c4cjbtlqf6yt.us-east-1.rds.amazonaws.com:3306/ebdb |
| SPRING_DATASOURCE_USERNAME | Database username e.g root |
| SPRING_DATASOURCE_PASSWORD | Database password
Welcome123# |
| SPRING_JPA_HIBERNATE_DDL_AUTO | update |
| SPRING_JPA_DATABASE_PLATFORM | org.hibernate.dialect.MySQL5Dialect |
- Save the environment properties once done.
- Apply your changes.
- AWS will update the Elastic Beanstalk environment.

- Once the deployment completes, try accessing the application again.
- You can now see that you can login to the application and use it.
6.0 Testing auto-scaling of application
Now that we have deployed and tested that our application works, lets find out how AWS auto-scales our application.
6.1 Verifying number of EC2 instances that are running
- First of all let’s verify how many instances are currently running.
- Go to Services >> EC2 >> Instances.
- As you can see there is only 1 EC2 instance of our application that is running.

6.2 Increase the load on the application
- Now let’s increase the load on our application.
- If you remember, the auto-scaling trigger was based on HTTP Request Count.
- We will hit the application base url (http://sample-app01.us-east-1.elasticbeanstalk.com/#/ ), multiple times to increase the request count.
- Open multiple terminal windows (in Linux or Mac), and run following shell script to keep hitting the application base url in loop
while : do curl -I http://sample-app01.us-east-1.elasticbeanstalk.com/#/ done - For my demo, I had opened up around 40-50 terminal and ran above script in each one of them.
- Please note that this script will not work on Windows OS, and you may need to find another way to increase the Request count on the application.
6.3 Verifying that auto-scaling works
- Go to your application environment >> Events.
- Wait for few minutes, and then you can see something like this below
- AWS provisioned new EC2 instances for our application as the load increased.

- You can also verify the same, by going to Services >> EC2 >> Instances.
- As you can see there are 3 EC2 instances running currently

6.4 Downscaling of application
- Just as AWS auto provisioned new EC2 instances on increased load, it will also remove instances when load is decreased.
- To decrease the application load, just kill/terminate all the scripts running in terminal windows.
- This will reduce the number of HTTP requests received by the application.
- Go to your application environment >> Events.
- Wait for few minutes, and then you can see something like this below

- You can also verify the same, by going to Services >> EC2 >> Instances.
- As you can see there are 1 EC2 instances running currently

With this we finish our blog on how to setup an Elastic Beanstalk environment on AWS.
In our future blogs we will look at how to setup application using Elastic Container Service and Elastic Kubernetes Service on AWS.

wonderful and clear tutorial! Thanks!
LikeLike